Login
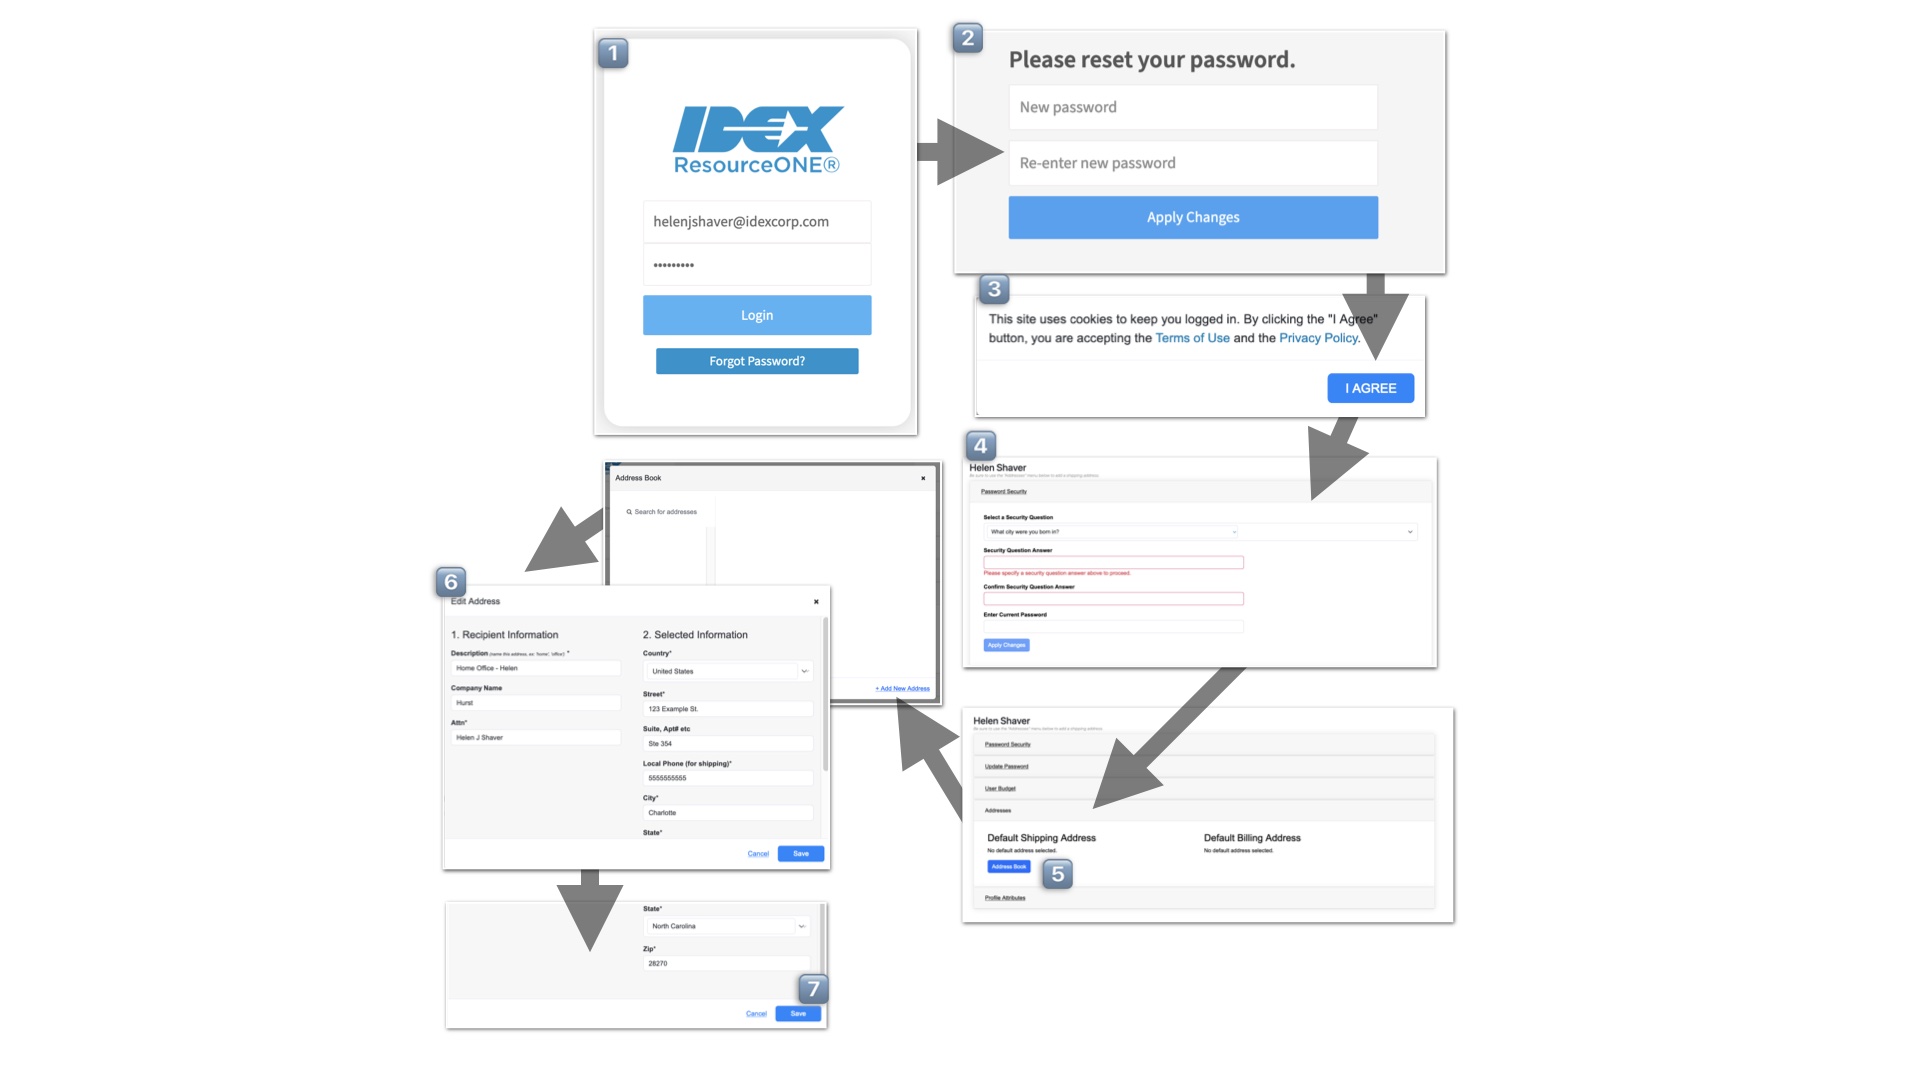
1️⃣ Access IDEX ResourceONE® by clicking the direct link: https://idexfs-r1.com. You will be directed to the landing page unless it is your first login.
2️⃣ For your first login, reset your password from the default provided, using a combination of 2 capital letters and 2 numbers.
3️⃣ Review the Terms of Service and Privacy Policy, and click "I AGREE" to continue.
4️⃣ Set a Security Question and click "Apply Changes."
5️⃣ It is recommended to add a new address by scrolling down, opening the address book, and clicking "+ Add New Address."
6️⃣ In the Edit Address dialog, enter an address to be used for shipping and billing.
7️⃣ Scroll down to see all fields, such as State and Zip, then click "Save."
🔁 If you need to add another address, like a distinct Billing Address linked to your credit card, repeat steps 5 through 7.

Landing Page
When you log in, you will see the landing page. The content may vary to feature new products or campaigns, but the page will consistently include:
1️⃣ A Search Bar for easy navigation and product search.
2️⃣ A link to view all products in the catalog, allowing you to browse the entire selection.
3️⃣ A link to contact Customer Service, ensuring assistance is readily available when needed.
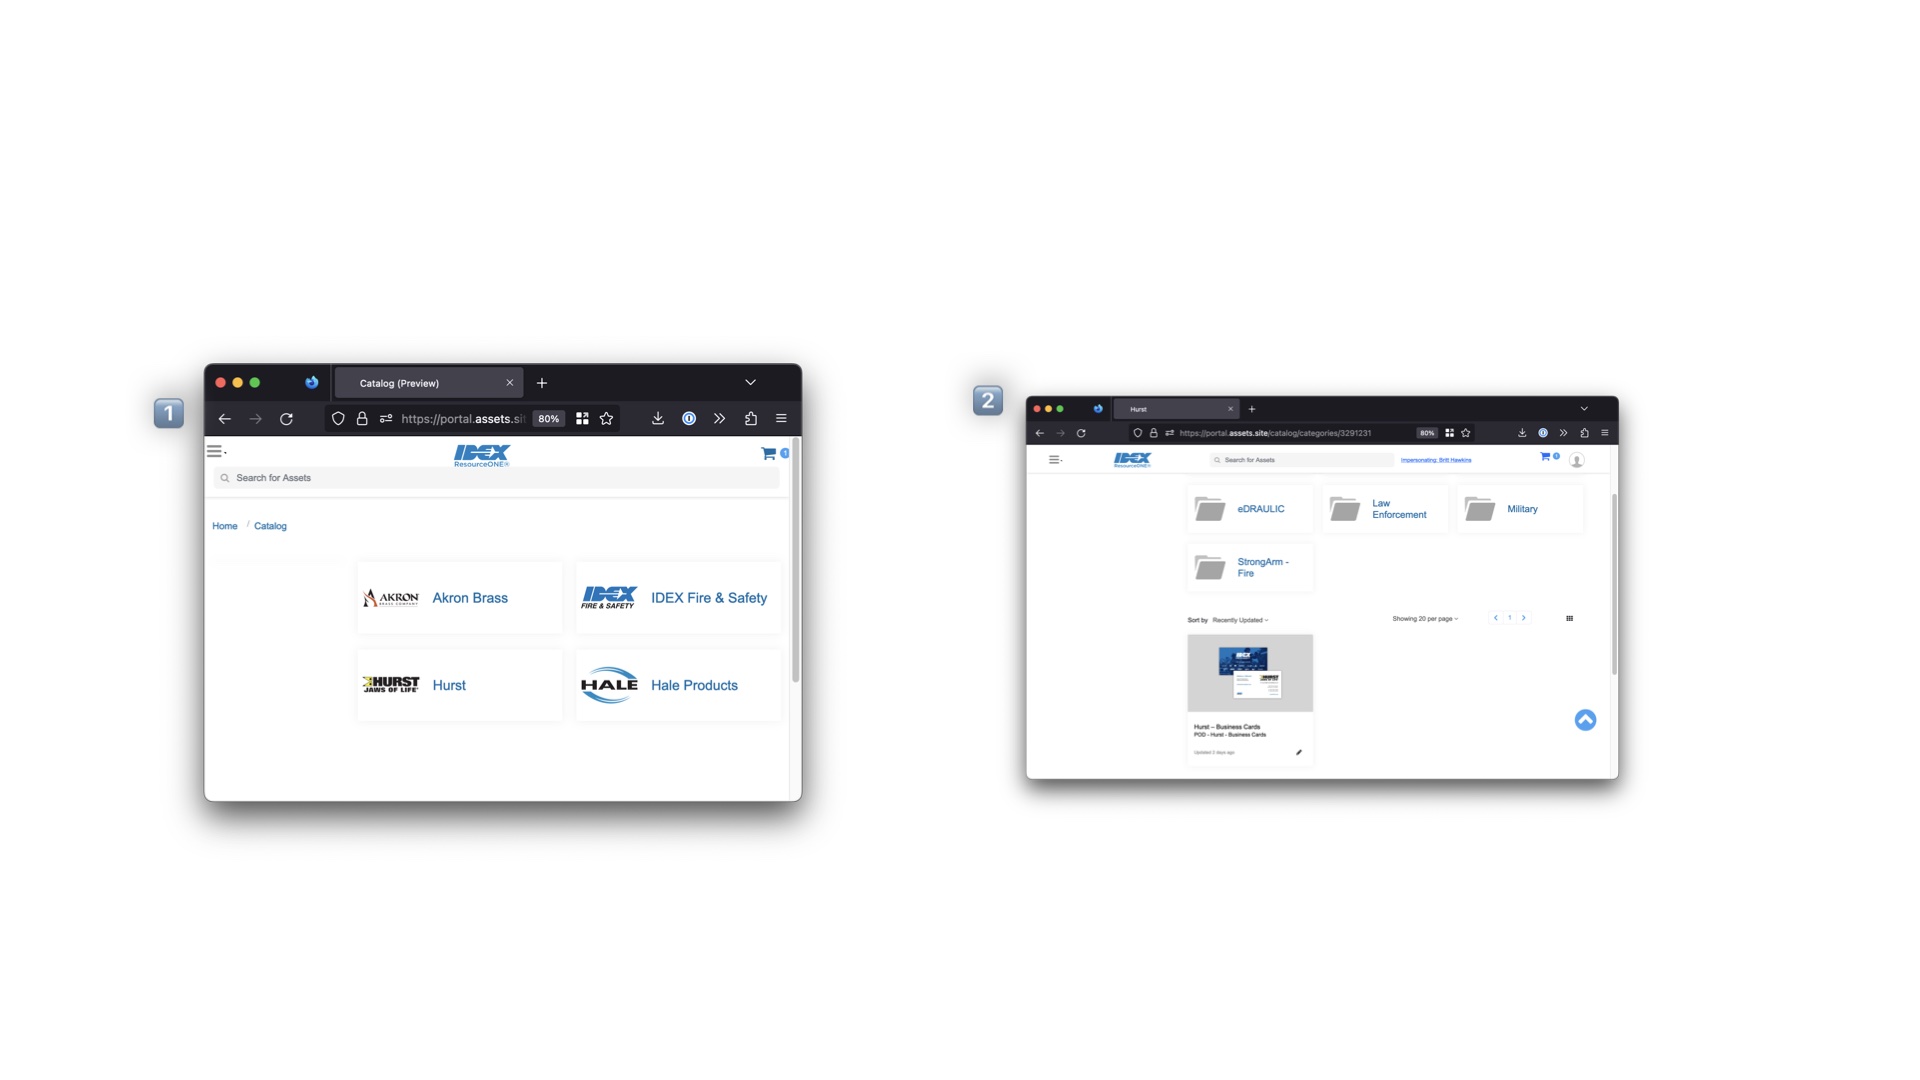
Catalog and Products
When you enter the catalog:
1️⃣ You will see icons representing each business unit you have access to. Click on the desired business unit to view its contents.
2️⃣ After selecting a business unit, you will be presented with available products and subcategories, such as individual items like a business card, or folders containing marketing materials for a specific product line.
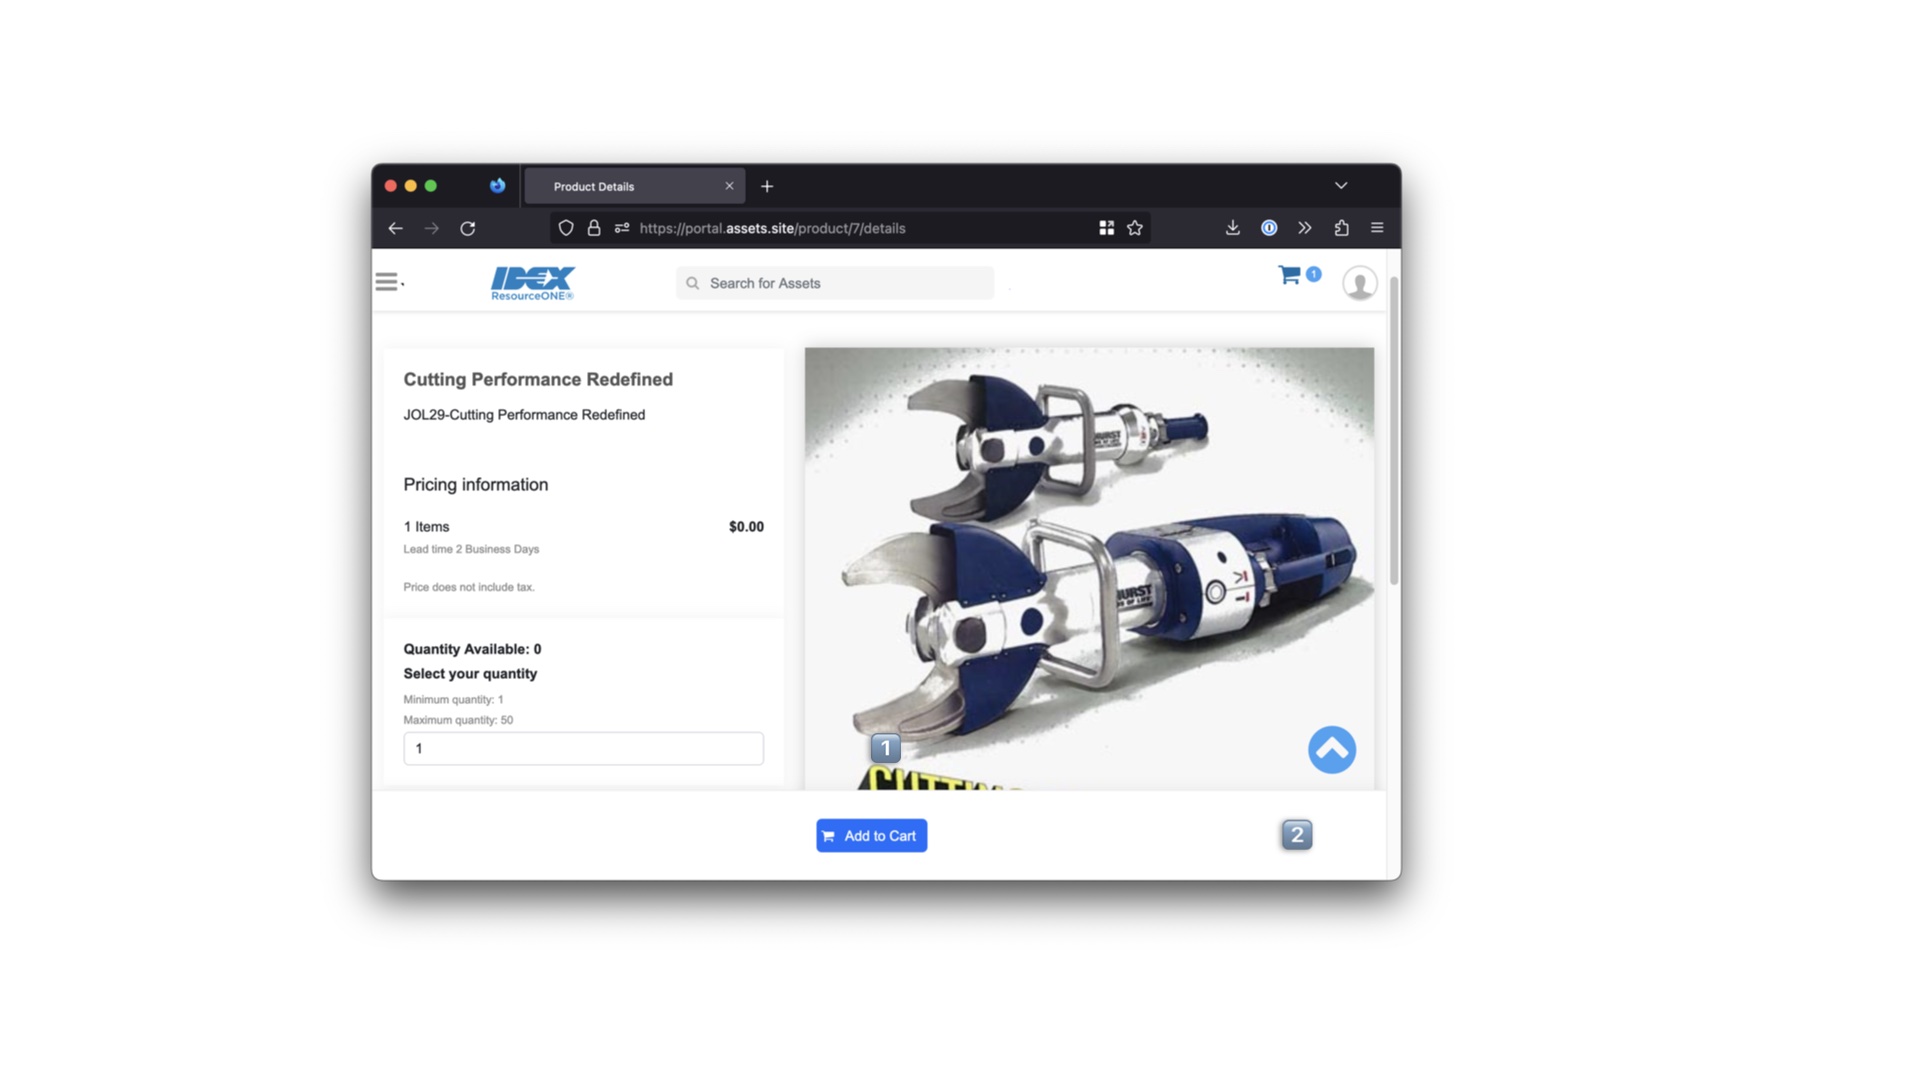
Product Page
Ordering a Static Product
On the product page, you'll find details about the item, including an image preview and the minimum order quantity. To place an order:
1️⃣ Enter the desired quantity in the provided field.
2️⃣ Click "Add to Cart" to add the item to your shopping cart.
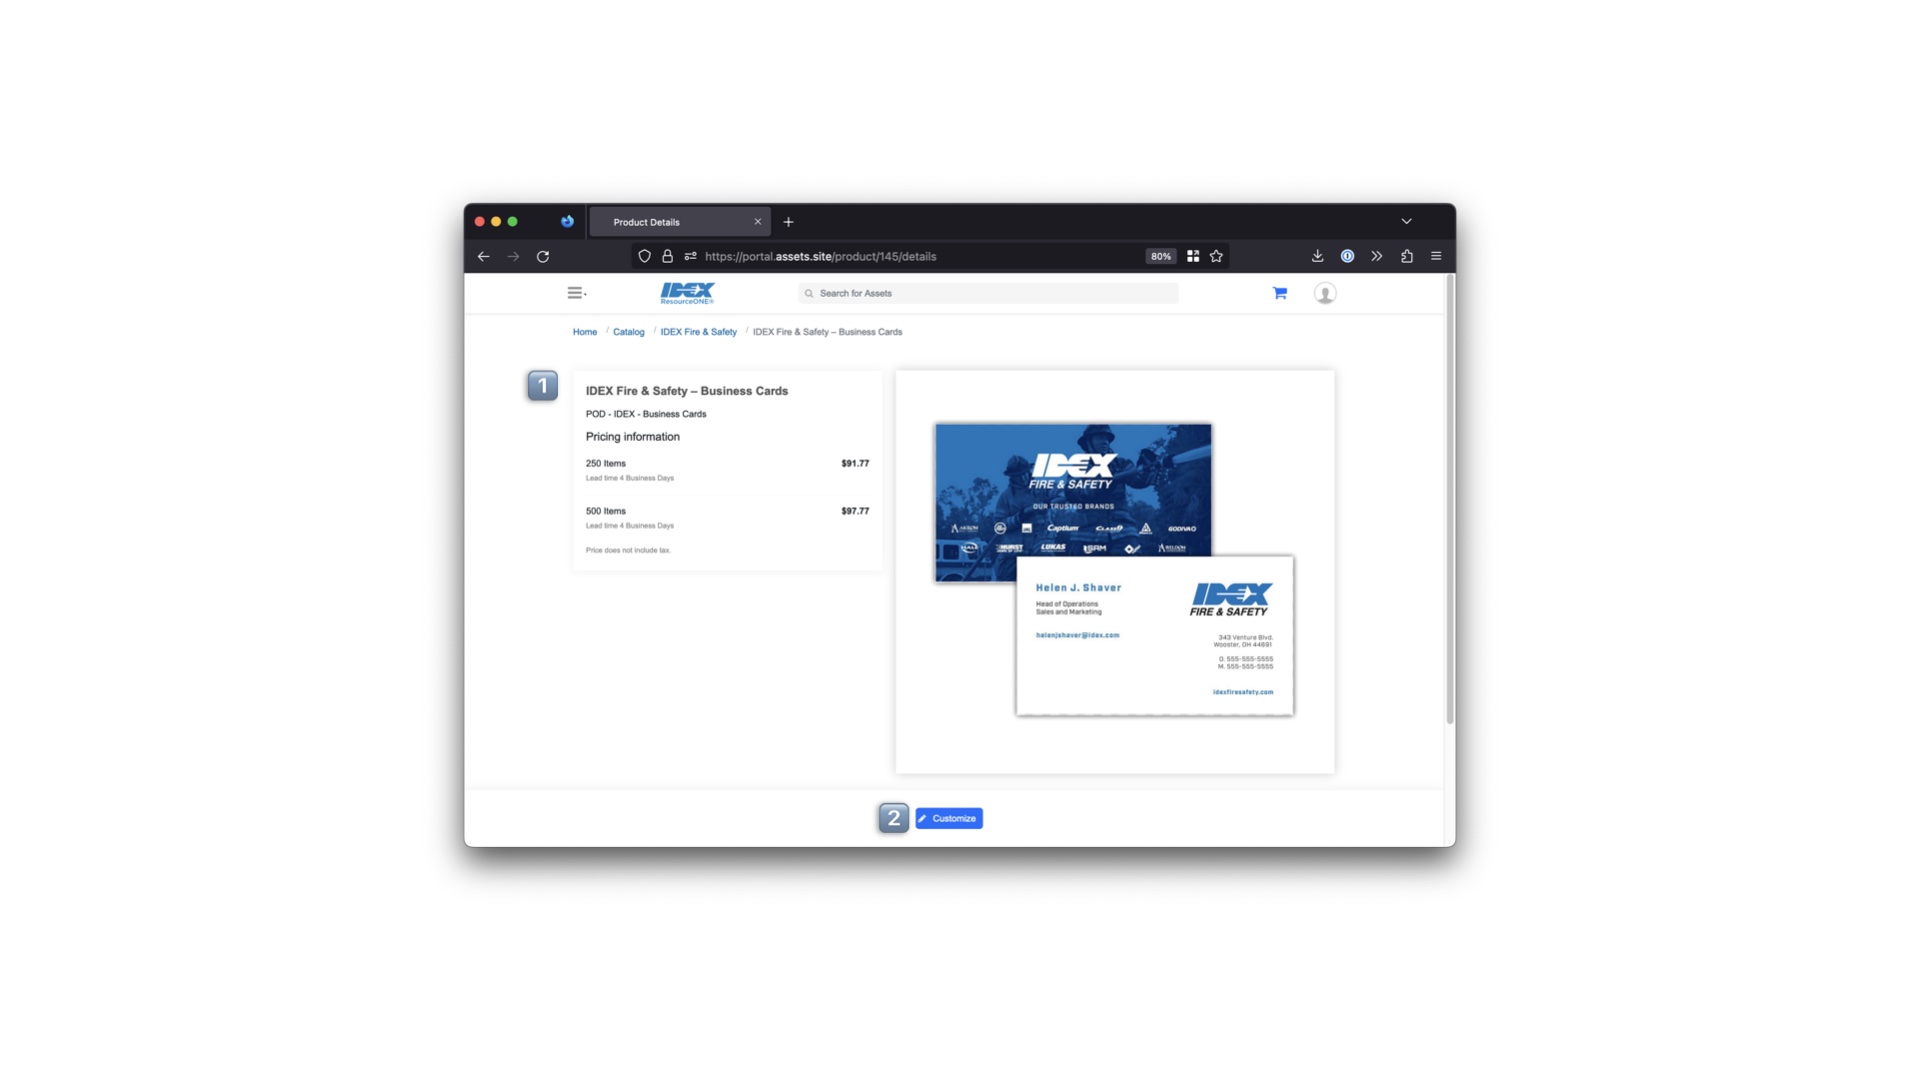
Product Page
Ordering a Business Card
The product page provides details about the item, including:
1️⃣ An example card preview, available quantities for print-on-demand, and pricing information.
To create your personalized business card:
2️⃣ Click "Customize" to begin the customization process.
Customize Page
Ordering a Business Card
To customize your business card:
1️⃣ Use the form on the left-hand side of the page to enter your information.
2️⃣ You must provide at least one phone number. If you need to include an office number, a mobile number, or both, select the appropriate option from the dropdown menu.
3️⃣ Preview your entry to ensure everything appears as desired.
4️⃣ Once you're satisfied with the preview, click "Done."
5️⃣ You'll see a customization confirmation. Click the "Add to Cart" button, and then choose the quantity you'd like to add to your cart.
Your customized card will remain in your cart unchanged unless you decide to re-customize it, remove it from your cart, or complete your order.
Checking Out
To proceed with your order:
1️⃣ Click on the Cart icon located in the top right corner of the navigation bar.
2️⃣ If you're using a smaller screen, you will be directed to a full-screen cart preview. Click "Proceed to Checkout" within the cart preview to continue with the checkout process.
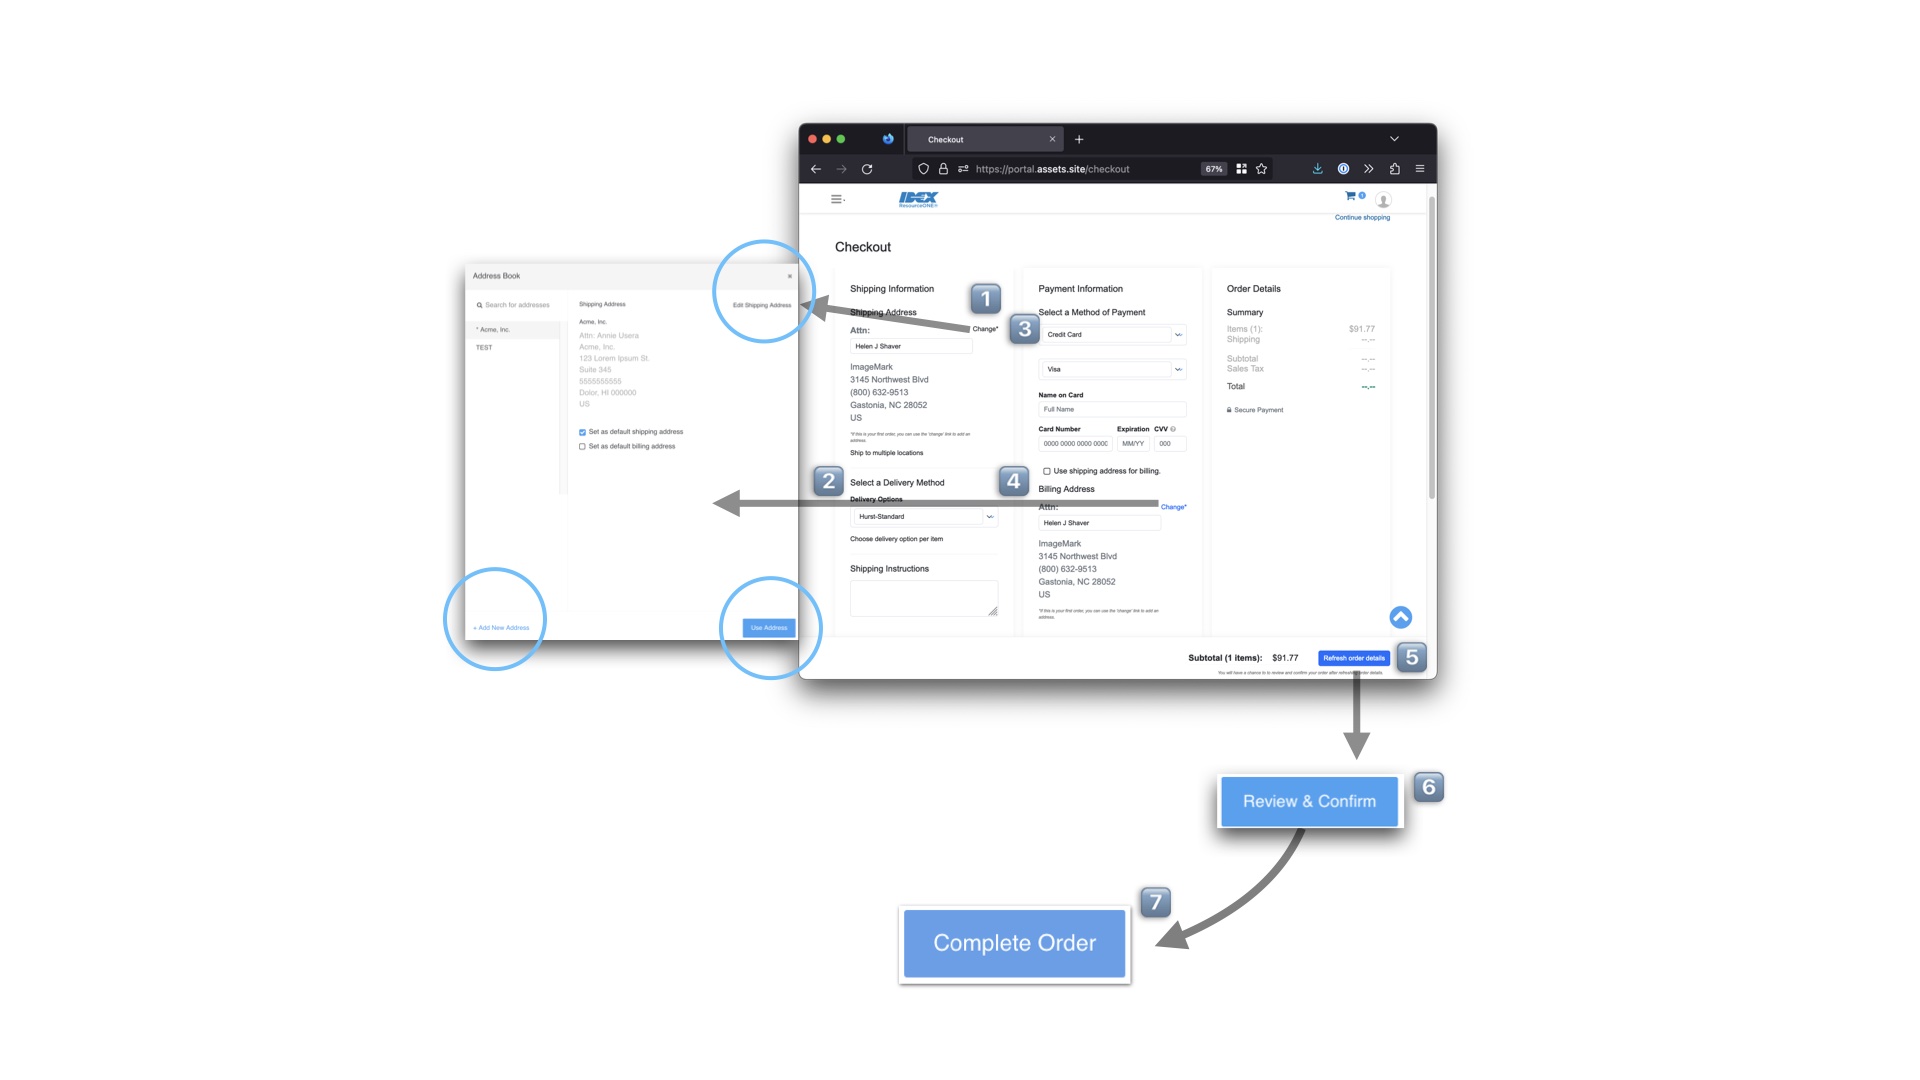
Checking Out
To complete the checkout process:
1️⃣ Select an existing Shipping Address or add a new one.
2️⃣ Choose a Delivery Method. The options available will depend on the Business Units from which you are ordering items.
3️⃣ If you are ordering a business card, the "Credit Card" payment method should already be selected. If you are ordering marketing materials only, select "Purchase Order" to place an order without using a credit or debit card.
4️⃣ Select an existing Billing Address or add a new one. Make sure it matches the address associated with your credit or debit card if you are using one as a payment method. After adding a new address and clicking “Save”, make sure to select it in the Address Book and click the “Use Address” Button in the lower right hand corner.
5️⃣ Click "Refresh Order Details" to update the information.
6️⃣ Click "Review and Confirm." If there are any invalid details, you will be prompted to correct them at this stage.
7️⃣ Finally, click "Complete Order" to finalize your purchase.
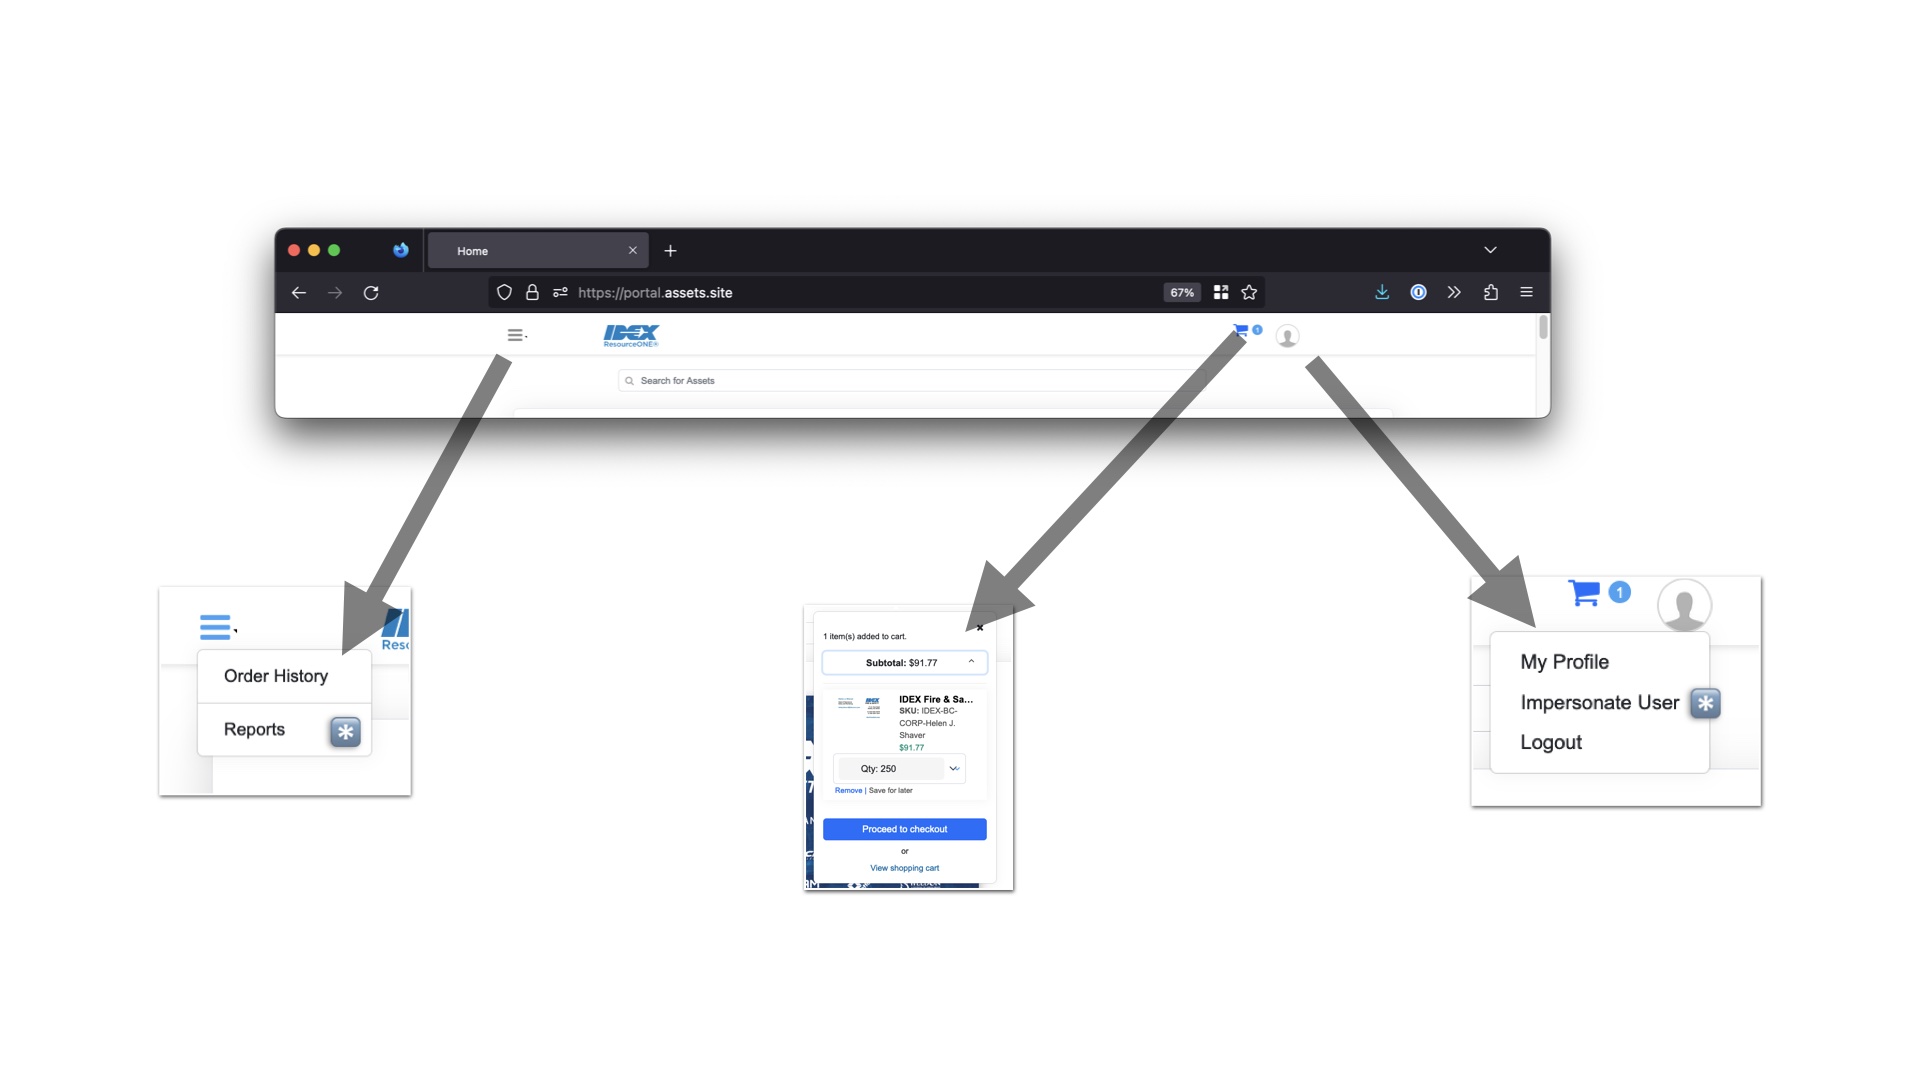
Header Overview
*Administrator Only
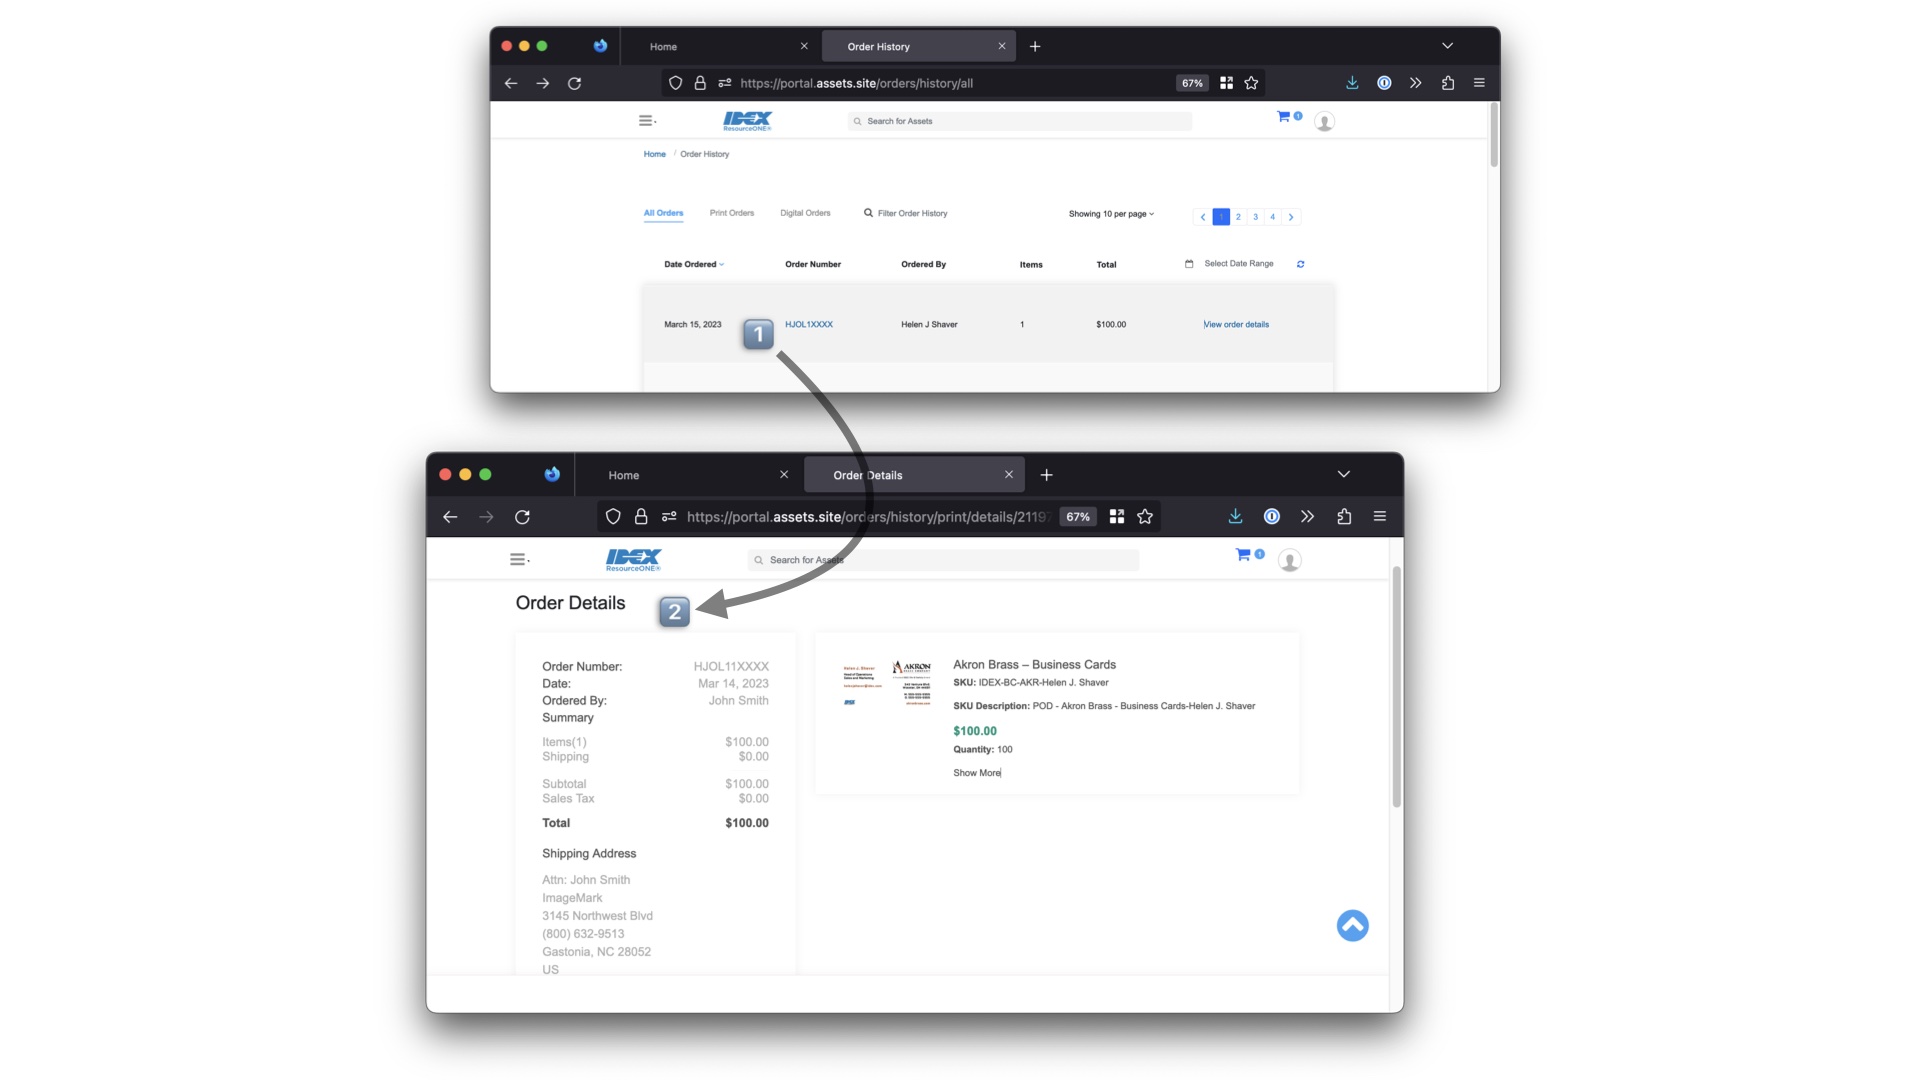
Order History
To view your order details:
1️⃣ Click on the Order Number.
2️⃣ This will take you to the order details page, where you can review the specifics of your purchase.

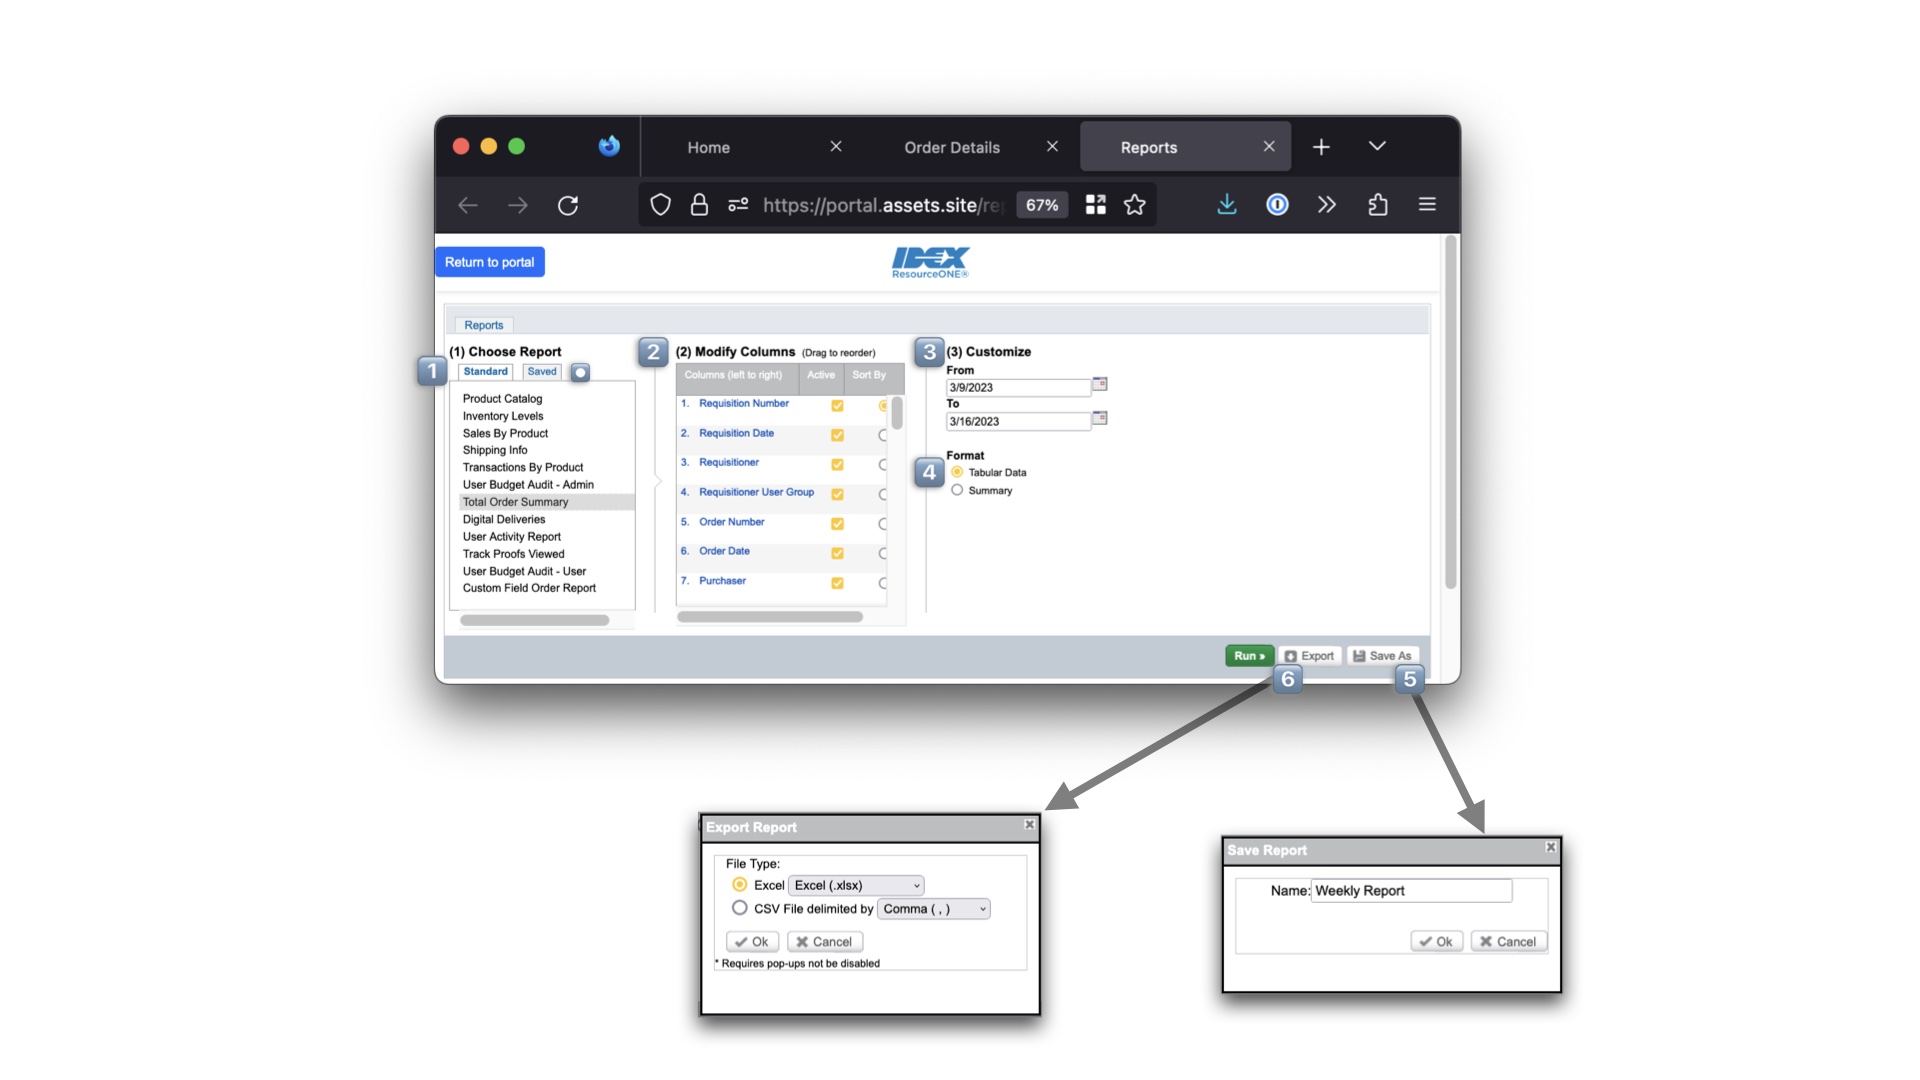
Reports*
To generate a report (for Administrators only):
1️⃣ Choose a report type.
2️⃣ Select the data/columns you want to include in the report.
3️⃣ Choose the date range for the report.
4️⃣ Select the report format. Tabular Data is recommended.
5️⃣ Optionally, save the report settings. These will be stored under the Saved tab.
6️⃣ Export the report to your desired file type (e.g., Excel, CSV).
*Please note that this feature is available to Administrators only.